
The Ultimate Guide to Making Perfect Chicken and Gravy: A Foolproof Recipe for Home Cooks
Table of Contents
Picture this: The aroma of golden-brown chicken wafting through your kitchen, mingling with the rich scent of homestyle gravy bubbling on the stovetop. Creating this classic comfort duo might seem daunting, but you’re about to discover the secrets that will transform your cooking game. Whether you’re preparing a cozy Sunday dinner or impressing guests, this comprehensive guide will walk you through crafting chicken and gravy that rivals your grandmother’s beloved recipe.
Essential Kitchen Equipment
Before diving into the cooking process, gather these crucial tools that’ll set you up for success:
Your trusty large skillet or Dutch oven will serve as the foundation for this culinary adventure. Keep a whisk nearby – it’s your secret weapon for silky-smooth gravy. Don’t forget measuring cups and spoons for precision, and a reliable meat thermometer to ensure food safety. A wooden spoon and strainer round out your essential toolkit.
Ingredients That Make the Difference
For the Chicken
Creating memorable chicken starts with quality ingredients. Here’s what you’ll need:
| Ingredient | Amount |
|---|---|
| Whole chicken | 4-5 pounds |
| Butter | 4 tablespoons |
| Salt | 2 teaspoons |
| Black pepper | 1 teaspoon |
| Fresh thyme | 4 sprigs |
| Garlic cloves | 6, whole |
| Yellow onion | 1, quartered |
For the Gravy
Transform those precious pan drippings into liquid gold:
| Ingredient | Amount |
|---|---|
| Pan drippings | All from chicken |
| All-purpose flour | 1/4 cup |
| Chicken broth | 2 cups |
| Heavy cream | 1/4 cup |
| Salt and pepper | To taste |
| Fresh herbs | Optional |
Step-by-Step Preparation Guide
1. Preparing the Chicken
Begin your culinary journey by treating your chicken right. Remove it from the refrigerator 30 minutes before cooking – this ensures even cooking. Pat the bird thoroughly dry with paper towels; moisture is the enemy of crispy skin. Season generously inside and out with salt and pepper, allowing the seasoning to penetrate the meat.
Stuff the cavity with your aromatic mixture of quartered onion, whole garlic cloves, and fresh thyme sprigs. These ingredients will infuse your chicken with incredible flavor from the inside out. If you’re feeling ambitious, truss the chicken with kitchen twine to promote even cooking, though this step remains optional.
2. Cooking Method
Preheat your oven to 375°F (190°C) while you prepare the stovetop. Heat your skillet over medium-high heat until it’s properly hot. Add butter and let it foam before placing your chicken, breast-side down. This initial sear creates that gorgeous golden crust you’re aiming for.
Once browned, flip the chicken breast-side up and transfer the entire skillet to your preheated oven. Cook until the internal temperature reaches 165°F at the thickest part of the thigh. This typically takes about 1 hour and 15 minutes for a 4-pound chicken, but your thermometer is the ultimate judge.
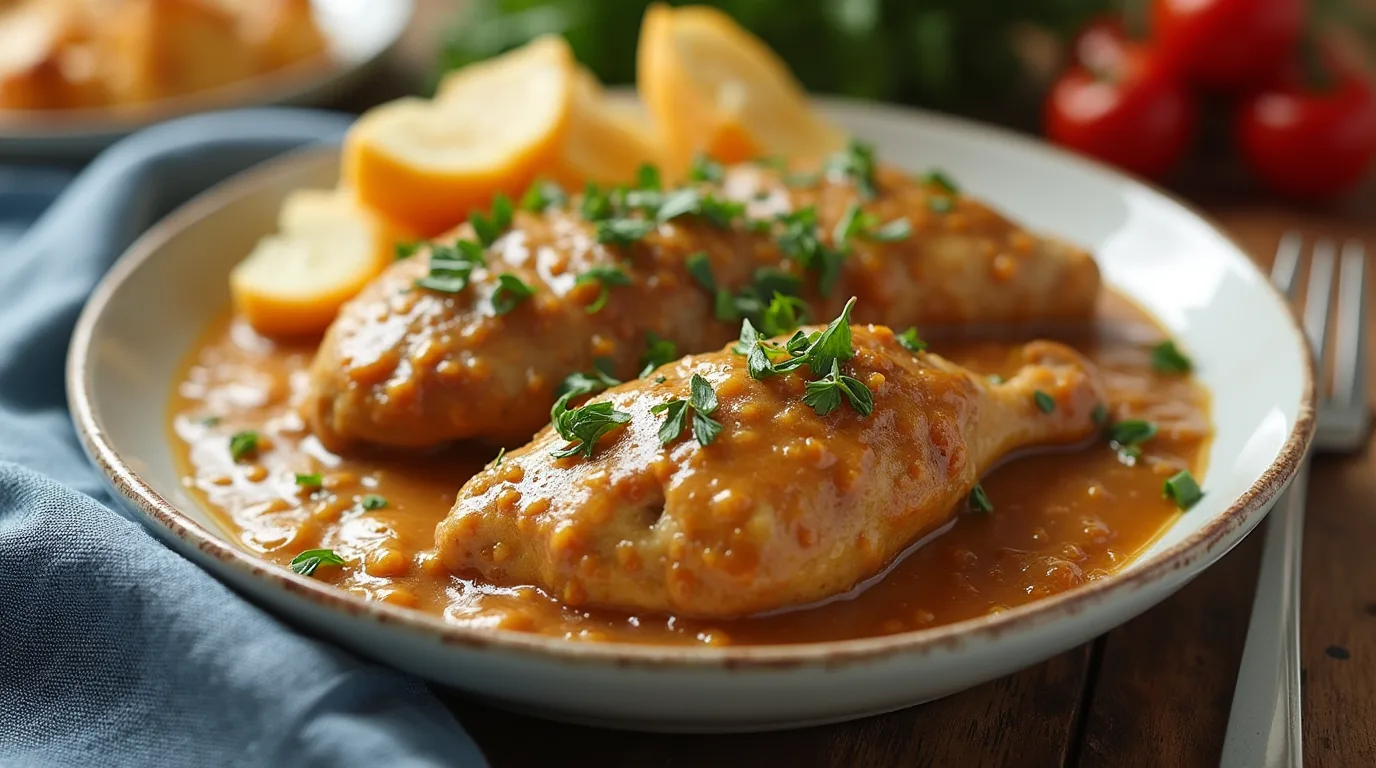
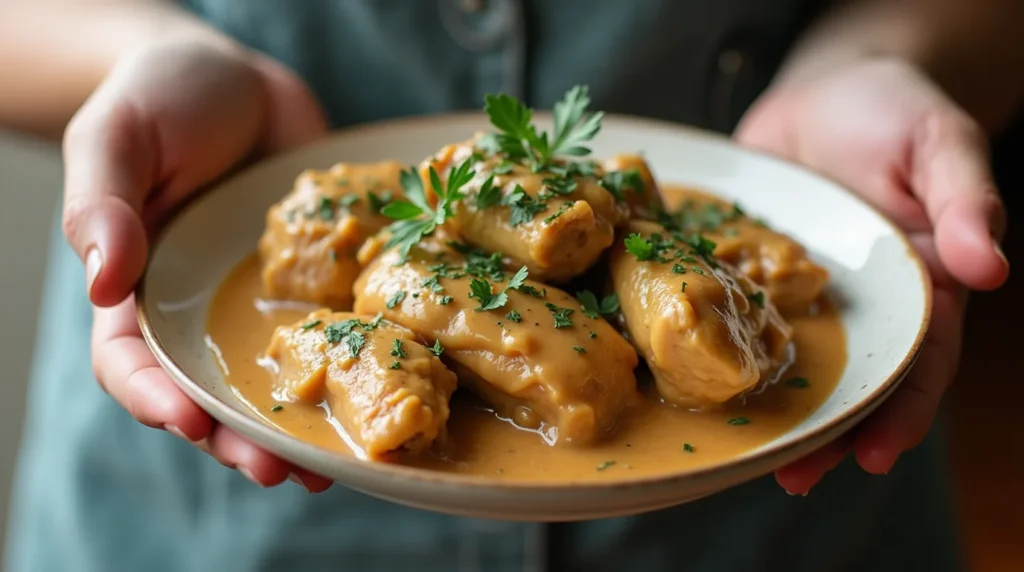
3. Making the Perfect Gravy
Here’s where kitchen magic happens. Once your chicken has finished cooking, transfer it to a cutting board to rest. Pour off all but about 1/4 cup of the pan drippings, keeping those flavorful browned bits in the skillet.
Return the skillet to medium heat and sprinkle in your flour. Whisk continuously while cooking the flour in the fat for about 2 minutes – this prevents that dreaded raw flour taste. Gradually stream in your chicken broth while whisking constantly. This gradual addition prevents lumps and creates silky-smooth gravy.
Continue cooking and whisking until the gravy thickens to your desired consistency. Finish with a splash of heavy cream and adjust the seasoning with salt and pepper. If you’re feeling fancy, strain the gravy through a fine-mesh sieve for the ultimate smooth texture.
Pro Tips for Success
Your chicken needs to rest for 15-20 minutes before carving. This isn’t just chef talk – it allows the juices to redistribute throughout the meat, ensuring every bite stays moist. While your chicken rests, focus on perfecting your gravy.
Want restaurant-quality shine in your gravy? Whisk in a small pat of cold butter just before serving. This technique, known as mounting with butter, creates an irresistible silky finish and adds extra richness.
Common Mistakes to Avoid
Don’t skip patting your chicken dry – this step is crucial for achieving crispy skin. Avoid overcrowding your pan with vegetables or additional ingredients during the initial cooking phase; your chicken needs space to brown properly.
When making gravy, resist the urge to add your liquid all at once. Gradual addition while whisking constantly ensures smooth, lump-free results. Remember that seasoning should happen in layers – both the chicken and gravy need proper seasoning at each step.
Storage and Reheating Guidelines
Store leftover chicken and gravy separately in airtight containers. They’ll keep in the refrigerator for up to 4 days. When reheating, bring gravy to a gentle simmer on the stovetop, adding a splash of broth if needed to reach desired consistency. Reheat chicken in a 350°F oven until warmed through to maintain texture.
Frequently Asked Questions About Chicken and Gravy Recipe
- How do you prevent chicken and gravy from becoming too dry?
The key lies in proper temperature control and not overcooking. Use a meat thermometer and remove the chicken from heat when it reaches 165°F. - Can this chicken and gravy recipe be prepared ahead of time?
Yes! You can prepare components separately up to 2 days ahead. Reheat gently before serving. - What’s the secret to lump-free gravy in this chicken and gravy recipe?
Gradual liquid incorporation while continuously whisking is crucial. Also, ensure your roux (flour and fat mixture) is well-cooked before adding liquid. - How long does homemade chicken and gravy last in the refrigerator?
Properly stored in airtight containers, both chicken and gravy maintain quality for up to 4 days. - Can chicken parts be used instead of a whole chicken for this recipe?
Absolutely! Adjust cooking times accordingly – bone-in pieces typically require 35-45 minutes in the oven.
Serving Suggestions
Transform your chicken and gravy into a complete feast by pairing it with fluffy mashed potatoes, roasted seasonal vegetables, or buttery dinner rolls. For wine enthusiasts, a medium-bodied Chardonnay or light Pinot Noir complements this dish beautifully.
Conclusion
You’re now equipped with everything needed to create restaurant-quality chicken and gravy in your own kitchen. Remember, perfect results come from attention to detail, quality ingredients, and practice. Each time you make this dish, you’ll discover new nuances and develop your own signature touches.
Ready to start cooking? Gather your ingredients, preheat that oven, and prepare to amaze your family and friends with your culinary prowess. Share your results in the comments below – we’d love to hear how this recipe works in your kitchen!
Share with us your experience
There are no reviews yet. Be the first one to write one.