

Cheesy Garlic Chicken Wraps: A Deliciously Simple Meal
Table of Contents
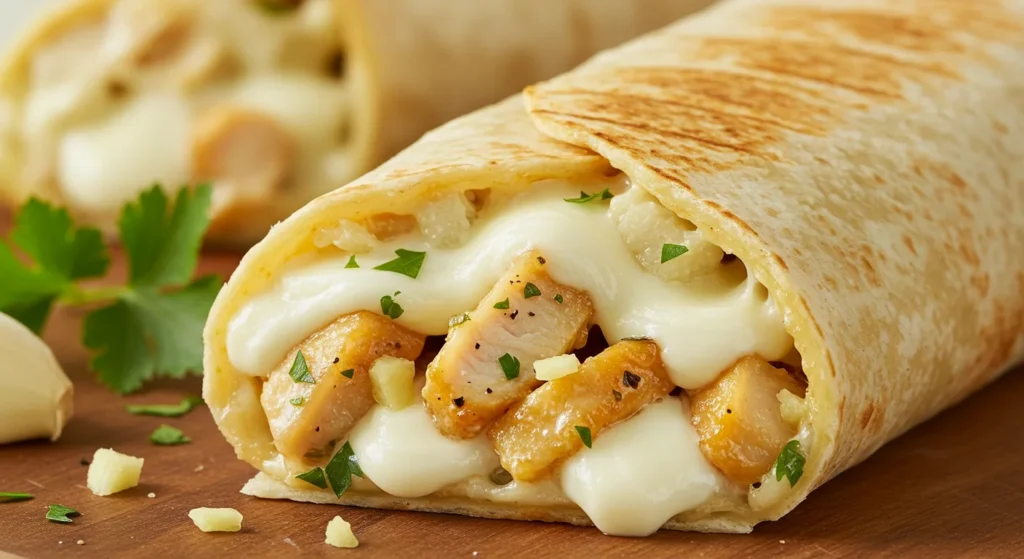
If you’re looking for a quick, delicious, and comforting meal, these Cheesy Garlic Chicken Wraps are the perfect choice! Packed with tender chicken, melted cheese, and a rich garlic flavor, these wraps come together in no time, making them a great option for busy nights or when you’re craving something satisfying.
Why You’ll Love These Cheesy Garlic Chicken Wraps
- Quick & Easy: Ready in under 30 minutes, this recipe is perfect for anyone with a busy schedule but still wants to enjoy a homemade, flavorful meal.
- Cheesy Goodness: The combination of mozzarella and cheddar cheeses creates a creamy, cheesy filling that melts in your mouth.
- Garlic Flavor: The garlic-infused chicken adds an irresistible depth of flavor that pairs perfectly with the cheeses.
- Versatile: Feel free to customize the wraps with your favorite veggies or dipping sauces, making it easy to adapt to your tastes.
Ingredients
For the chicken filling:
- 2 cups cooked and shredded chicken (perfect for using leftover rotisserie chicken!)
- 1 tablespoon olive oil
- 3 cloves garlic, minced
- ½ teaspoon salt
- ¼ teaspoon black pepper
- ½ teaspoon garlic powder
- ½ teaspoon onion powder
- ½ teaspoon smoked paprika (optional)
- ½ cup cream cheese, softened
- ½ cup shredded mozzarella cheese
- ½ cup shredded cheddar cheese
- 2 tablespoons chopped fresh parsley (optional, for garnish)
For assembling the wraps:
- 4 large flour tortillas
- 2 tablespoons butter, melted
- ½ teaspoon garlic powder
- ¼ cup shredded Parmesan cheese
Instructions
- Prepare the Chicken Filling:
- Start by heating olive oil in a skillet over medium heat. Add the minced garlic and sauté for about 30 seconds until fragrant.
- Add the shredded chicken to the skillet along with salt, black pepper, garlic powder, onion powder, and smoked paprika (if using). Stir well to coat the chicken with the seasonings and heat through for 2-3 minutes.
- Remove the skillet from the heat and add the softened cream cheese, mozzarella, and cheddar cheese. Stir until the cheeses melt and the mixture becomes creamy and well-combined. Add the chopped parsley for a touch of freshness.
- Assemble the Wraps:
- Lay the flour tortillas flat on a clean surface. Evenly divide the chicken filling among the tortillas, placing the mixture slightly off-center.
- Fold in the sides of each tortilla, then roll them up tightly to enclose the filling. The result should be a neatly sealed wrap.
- Cook the Wraps:
- In a small bowl, mix the melted butter with garlic powder. Brush this garlic butter mixture over the tops of the wraps.
- Sprinkle a little Parmesan cheese over the buttered wraps for extra flavor and a golden, crispy exterior.
- Heat a skillet or griddle over medium heat. Place the wraps, seam side down, and cook for 2-3 minutes per side, or until the tortillas are golden brown and crispy, and the cheese inside has fully melted.
- Serve:
- Remove the wraps from the skillet and let them cool slightly before slicing in half. Serve them warm, paired with your favorite dipping sauces like ranch, marinara, or garlic aioli.
Tips for Success
- Make Ahead: You can prepare the chicken filling ahead of time and store it in the refrigerator for up to two days. When you’re ready to assemble, simply warm the filling and follow the rest of the recipe.
- Add Vegetables: For a healthier twist, try adding some sautéed spinach, bell peppers, or mushrooms to the chicken filling.
- Reheating: If you have leftovers, reheating in a skillet or oven is the best way to preserve the crispy texture.
Why This Recipe Works
These Cheesy Garlic Chicken Wraps are the perfect balance of cheesy, savory, and satisfying. The garlic butter brushed on the outside gives each wrap a deliciously crispy finish, while the inside remains gooey with melted cheese and flavorful chicken. Whether you’re serving these for a quick dinner, meal prep, or a weekend snack, they’re sure to become a favorite in your kitchen.
Conclusion:
These Cheesy Garlic Chicken Wraps are the ultimate comfort food—cheesy, savory, and incredibly satisfying. With a simple list of ingredients and a quick cooking time, this recipe is perfect for busy nights when you crave something flavorful but don’t want to spend too much time in the kitchen. Whether you’re enjoying them as a family dinner, meal prep for the week, or a tasty snack, these wraps are sure to become a favorite in your household. Plus, they’re versatile enough to adapt to your tastes, so feel free to experiment with different fillings or toppings. Ready to indulge in cheesy, garlicky goodness? Give this recipe a try and experience the ultimate comfort in every bite!
FAQ:
1. Can I use pre-cooked chicken for this recipe?
Yes, using rotisserie chicken or any pre-cooked chicken is a great time-saver for this recipe. Just shred the chicken and it’s ready to use!
2. Can I make these wraps ahead of time?
Absolutely! You can prepare the chicken filling in advance and store it in the refrigerator for up to two days. When you’re ready to assemble, just warm up the filling and proceed with the recipe.
3. How can I make these wraps spicier?
If you enjoy a bit of heat, try adding some diced jalapeños, chili flakes, or even hot sauce to the chicken mixture. You can adjust the spice level to your liking!
4. What can I use instead of flour tortillas?
You can swap the flour tortillas for whole wheat, low-carb, or even gluten-free tortillas to suit your dietary needs. You could also use lettuce wraps for a lighter, low-carb alternative.
5. Can I freeze the wraps?
Yes, you can freeze the wraps before cooking. After assembling the wraps, place them in a freezer-safe container or wrap them individually in plastic wrap. When you’re ready to eat, cook them directly from frozen in a skillet until golden and crispy.
6. What are some good dipping sauces for these wraps?
These wraps pair perfectly with ranch, garlic aioli, marinara, or even a creamy chipotle sauce. Feel free to experiment and find your favorite dip!
7. How do I reheat leftover wraps?
To preserve the crispy texture, reheat the wraps in a skillet over medium heat or in the oven. This will keep the wraps crispy on the outside and warm on the inside. Avoid microwaving, as it can make the wraps soggy.
Share with us your experience
There are no reviews yet. Be the first one to write one.